If you've ever stared at your solar lights wondering when they'll finally charge, you're not alone. I've spent years engineering photovoltaic systems, and the most common question I hear is about charging time.
Here's what frustrates me: most guides give you a vague answer and move on. But charging time isn't just about waiting—it's about understanding the engineering behind your investment. When you know what actually drives charging performance, you can make smarter decisions and get better results.
Let me walk you through everything I've learned about solar light charging, from basic physics to real-world optimization strategies.
The Short Answer: How Long Does a Solar Light Really Take to Charge?

Solar lights typically take 4 to 10 hours of direct sunlight to fully charge. That's a wide range, I know. But here's why it varies so much.
The charging time depends on your light's battery size, how intense the sunlight is, and how efficient your photovoltaic panel converts that light into energy. For optimal performance, I always recommend giving your lights a full day of charging—especially when you first set them up.
Think of it like filling a gas tank. A bigger tank takes longer, a smaller nozzle flows slower, and the whole process depends on having access to the pump.
The 4 Key Factors Affecting Charging Time

Let me break down what actually controls how fast your solar lights charge.
1. Sunlight Exposure
This is the big one. Your lights need direct sunlight—not just daylight, but actual sun rays hitting the panel. I recommend positioning your lights where they'll get 6-8 hours of full sun exposure daily.
Shade from trees, buildings, or even your roof overhang can cut charging efficiency dramatically. Even partial shade matters more than you'd think.
2. Weather Conditions
Cloudy, rainy, or snowy days reduce charging efficiency significantly. The light intensity drops, and your panel captures fewer photons. This means longer charging times and potentially incomplete charges.
I've seen solar lights in Seattle take twice as long to charge as identical units in Arizona. Weather matters that much.
3. Battery Capacity
Larger battery storage means longer charging periods—simple physics. A light with a 2000mAh battery will charge much faster than one with a 12,500mAh battery, assuming identical panel sizes.
Think of it this way: filling a swimming pool takes longer than filling a bathtub, even with the same hose.
4. Initial Charge Requirements
Brand new solar lights often need an extended initial charge—sometimes 1-5 days. This isn't a defect. It's actually optimizing your battery's chemistry for maximum lifespan and performance.
I always tell customers to be patient with that first charge. It sets the foundation for years of reliable operation.
Beyond the Basics: The Engineering That Dictates Charging Speed

Now we're getting into the good stuff—the engineering principles that separate mediocre solar lights from exceptional ones.
Panel Size Matters: Why Surface Area is King
Here's something most people don't realize: panel size directly correlates with charging speed. A larger panel surface area captures more photons, period.
Think about it like rain collection. A bucket with a wider opening catches more water than a narrow one, even in the same storm. The physics is identical with solar panels and photons.
This is why professional-grade systems use oversized panels. More surface area means faster energy generation and shorter charging times.
Panel Technology: The Monocrystalline Advantage
Not all solar panels are created equal. I exclusively use monocrystalline panels in my designs, and here's why.
Monocrystalline panels have higher efficiency ratings than polycrystalline alternatives—often 18-22% versus 15-17%. But the real advantage shows up on cloudy days and during winter months. When light intensity drops, monocrystalline cells maintain better performance.
If you live anywhere with variable weather, this technology difference isn't just nice to have—it's essential for consistent charging.
The Power of the Angle: Optimizing Your Panel's Position
The sun's path changes throughout the year. In summer, it traces a high arc. In winter, it stays lower on the horizon.
A fixed panel can't capture maximum light year-round. But an adjustable panel? That's where you gain serious efficiency. By tilting your panel to match the sun's seasonal angle, you maximize direct light absorption.
I've measured 30-40% charging improvements just from proper angle adjustment. That's the difference between a full charge and running out of power at 2 AM.
The Unseen Enemy: How High Temperatures Impact Charging
Here's something that surprises people: excessive heat actually slows down charging. Most assume hotter equals better for solar, but that's wrong.
High temperatures increase resistance in the panel and stress the battery chemistry. This degrades charging efficiency and shortens battery lifespan over time. It's why quality systems include heat dissipation features.
In my testing, panels running 20°F cooler charge 15-20% faster and maintain capacity far longer. Heat management isn't optional—it's critical engineering.
What to Do When the Sun Isn't Cooperating: Alternative Charging Methods
Let's be honest: sometimes the weather doesn't cooperate. Here are your backup options.
USB Charging
Many modern solar lights include USB ports or connectors. This lets you plug into mains power, a laptop, or even a power bank during extended cloudy periods.
I recommend this for critical lighting where you can't afford gaps in operation. It's not cheating—it's being practical.
Artificial Light Charging
You can charge solar panels indoors with artificial light, though it's significantly less efficient. Expect 6-12 hours of charging time minimum.
The best artificial sources are incandescent bulbs (60W-100W work well), fluorescent lighting (CFLs or tube lights), and high-efficiency LED bulbs. Place the panel as close as safely possible to maximize light intensity.
Related: How to Charge Solar Lights Without Sun: 7 Methods + Ultimate Solution
How to Achieve the Fastest Possible Charge: An Engineered Solution

Everything I've explained so far leads to this: what does a properly engineered rapid-charging system actually look like?
The Advantage of a Large, High-Efficiency Solar Panel
Size matters, but size with efficiency matters more. A massive panel with poor conversion rates won't outperform a properly sized high-efficiency design.
The sweet spot combines generous surface area with premium monocrystalline cells. This maximizes photon capture while maintaining high conversion efficiency. In practical terms, you're looking at a panel that's at least 10W with dimensions around 13x7 inches for professional applications.
Gaining Full Control with an Adjustable Panel Angle
Fixed panels are fine if you live on the equator and don't mind suboptimal performance. For everyone else, adjustability is non-negotiable.
I look for panels with at least three angle positions. This gives you seasonal optimization without complicated mounting hardware. Set it steep in winter, shallow in summer, and you're capturing maximum solar energy year-round.
Protecting Your Investment with a Heat-Resistant Design
Remember what I said about heat being the silent killer? This is where thoughtful engineering shows up.
Heat-resistant housing and integrated sunshade designs keep internal temperatures manageable even during brutal summer days. This protects your battery chemistry and maintains optimal charging performance without thermal degradation.
The result? Consistent charging speeds regardless of ambient temperature, plus dramatically extended battery lifespan.
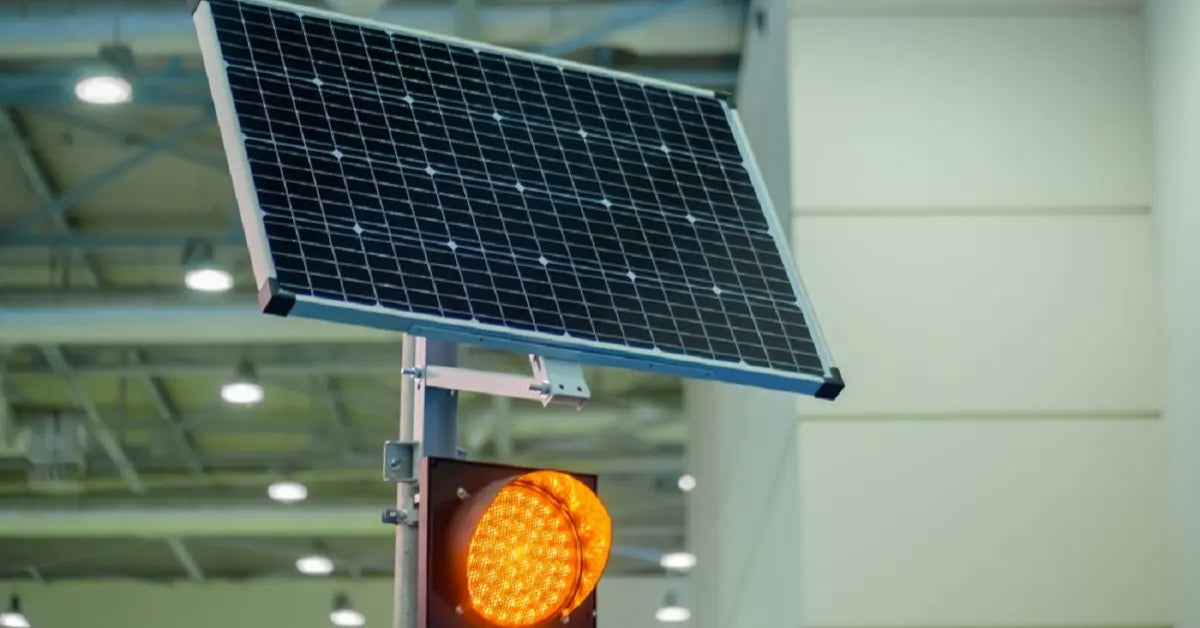
To see these principles of rapid-charging in a real-world design, consider a professional-grade solar street light like the Intelamp 3000LM. It was engineered specifically to maximize charging speed with its oversized 10W panel (13.4x7.3 inches), three adjustable angle gears, and heat-resistant design that protects the massive 12,500mAh LiFePO₄ battery. The result? A full charge in just 6-8 hours, even under challenging conditions.
Explore Professional-Grade Outdoor Lighting Systems
Understanding what drives charging performance empowers you to look beyond simple marketing claims. You can now evaluate any solar lighting system based on real engineering principles.
When you're ready to explore options built on these exact specifications, I invite you to explore our full collection of solar outdoor lights. Every system we design prioritizes the charging efficiency factors I've outlined here—because reliable performance starts with intelligent engineering.
FAQs
Do solar lights need the sun to charge?
No, they need light—but not necessarily sunlight. Solar lights can charge on cloudy days or even using artificial light sources, though direct sunlight delivers the best efficiency. The panels convert light photons into electrical energy regardless of the source, but intensity matters significantly.
How long does it take to fully charge a solar light?
Typically 4-10 hours of direct sunlight, though this varies widely based on battery capacity, panel size, and environmental conditions. Professional-grade systems with optimized panels can achieve full charges in 6-8 hours, while budget models may require 10-12 hours.
Do solar lights have to be switched on to charge?
Yes, the switch must be in the 'on' position for the solar panel to charge the internal battery. The circuit needs to be complete for energy flow. This confuses many first-time users, but it's standard across the industry.
Do solar lights need to be off to charge?
This is nuanced. While the switch must be 'on' for the panel to charge the battery, some manufacturers recommend switching lights 'off' during the initial charge cycle or for periodic deep charging. This maximizes battery capacity and extends lifespan by allowing complete, uninterrupted charge cycles.
The bottom line
Charging time isn't random—it's engineering. When you understand the factors that drive performance, you can make informed decisions and optimize your system for maximum efficiency.
I've designed these systems for years, and nothing frustrates me more than seeing customers struggle with poor-performing lights because they didn't know what to look for. Now you do.
Related Resources
How Many Hours Do Solar Lights Work? Expert Performance Guide
How Long Do Solar Lights Last? Engineer's Guide to Durability (2025)